Table of Contents:
Iris Shaders Mod is one of the most popular shader mods for Minecraft, and for good reason – it’s simply the best out there! This mod adds a whole new level of detail and realism to the game, making it look like a completely different experience. If you’re looking for a shader mod that will blow your mind, Iris Shaders Mod is definitely the one to try.
As a young girl, Iris loved spending her days exploring the forests near her home. She would often find herself getting lost among the trees, but that was never a problem; she always found her way back with ease.
One day, while deep in the forest, Iris came across a strange cave. It looked like no other cave she had ever seen before; it was much larger, and the walls were coated in a shiny material that sparkled in the sunlight. Intrigued, Iris ventured inside.
As she walked further into the cave, Iris began to feel as though she was being watched. She turned around several times but saw nothing out of the ordinary. Just when she was about to give up and turn back around,
Iris, as opposed to OptiFine, can completely utilize your graphics hardware while posing as little as feasible problems when combined with optimization mods like Sodium. Additionally, it gives you leverage by using the most up-to-date rendering techniques, giving you a comfortable lead in the game. Additionally, it has Optifine Parity and aims to provide full compatibility for all of the Optifine Shader Packs, both past and present. Iris supports an increasing number of packs over time, and this growth is constant.
Iris, sodium, and vanilla
Additionally, Iris 1.19.2 improves the way that Minecraft offers blocks and things like item frames, pigs, and chests. Even when the shaders are disabled, this still functions. Also, Iris can boost performance by up to 60% in some settings with a lot of entities. Additionally, there is a noticeable increase in shadow rendering because formerly unplayable shader regions now have a smoother and more functional frame rate than usual. A version of Iris 1.19 also exists, however due to issues, it is still in development. But it’s already functional enough to be useful when you want to take good screenshots. Sodium will eventually be included, despite the fact that it currently performs worse than the 1.17 version due to vanilla performance regressions.
A group of dedicated and cooperative developers produced Iris 1.19 as an open-source project. The main objective was to provide the greatest possible Minecraft shaders experience. The fact that Iris is created by the community and concurrently meets its needs in the same way is crucial. As a result of the diverse supporters, testers, code contributors, icon creators, and developers who make up Iris Shaders, a better mod for Minecraft shaders was made possible. Since it is open-source, mod developers have the freedom to freely and simply examine its code.
Iris, why?
Iris differs from other shader patches for a number of reasons. Here are a few examples:
Elegant Design: Iris was made to be both easily expandable and easily updated. You won’t have to wait weeks to use shaders in the most recent version of Minecraft thanks to this.
Iris is open-source and free, which entails that anyone is welcome to contribute to it. Iris is created by and for the community, and its development team is certain that by working together constantly, Iris can get better.
Impressive Mod Compatibility: Iris promotes mod compatibility as its main objective. It acknowledges the many compatibility difficulties that are most frequently encountered. You’ll discover that Iris comes equipped with several of your favorite mods and is completely functional.
Installing Iris
For standalone use
This method is recommended for users who want to play with Iris shaders only, without any other mods.
-
Go to the Iris shaders download page.
-
Click on “Download universal JAR”.
-
Save the file anywhere on your computer and run it.
Java is required to run the installer. If your system doesn’t have Java installed, download and install Java from Adoptium Java downloads. If you are using Windows and are still unable to run the installer, try using Jarfix. -
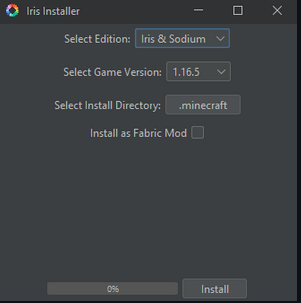
The following window should open:
-
Under the “Select game version” dropdown, select your preferred Minecraft version.
-
Click Install.
-
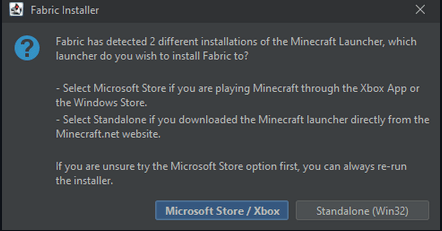
If you get the following prompt:
-
Select Microsoft Store / Xbox if you have updated to the new launcher. Otherwise, select Standalone (Win32).
-
You should see the button say “Installation succeeded!” next to the full progress bar:
![]()
-
Close the installer.
-
Next time when you open the Minecraft launcher, you should have the following profile (the version numbers may be different):
![]()
Play the game with this profile selected to run Iris Shaders!
Features:
– Allows the player to jump higher and glide through the air.
– Has a passive effect that allows the player to breathe under water.
– Allows the player to swim quickly and knock back mobs with a wave of water.
– Can be used to put out fires, fill buckets with water, and craft ice blocks.
– Allows the player to shoot fireballs, cook food quickly, and melt snow and ice.
– Allows the player to tunnel through earth, summon boulders from the sky, and increase movement speed while sprinting.
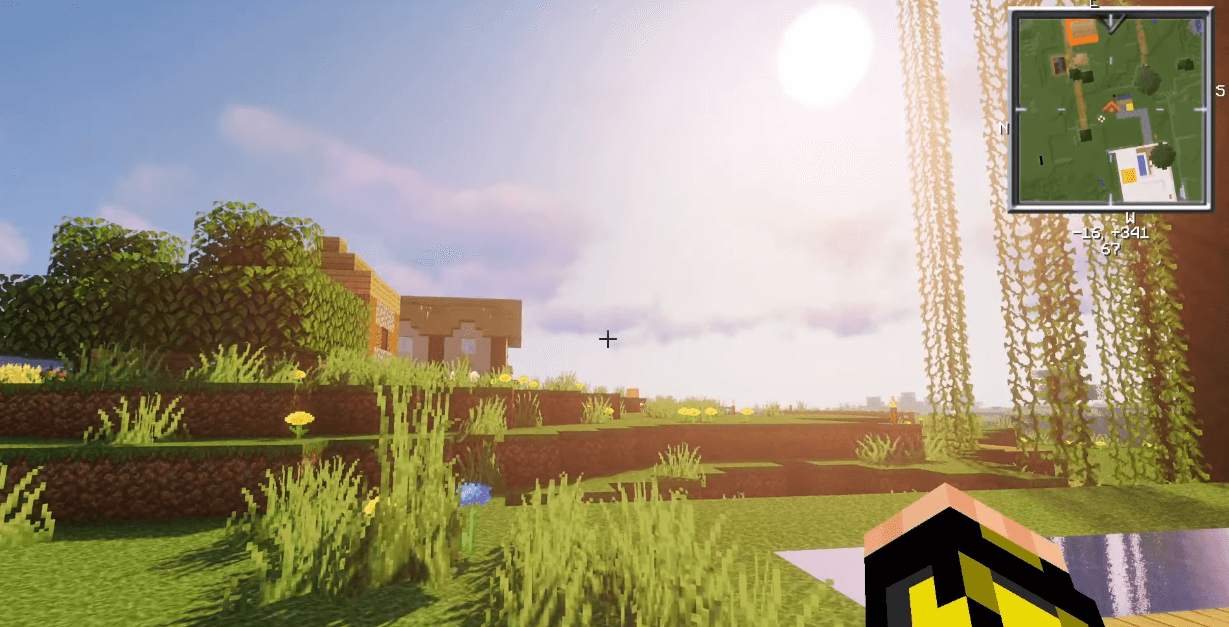
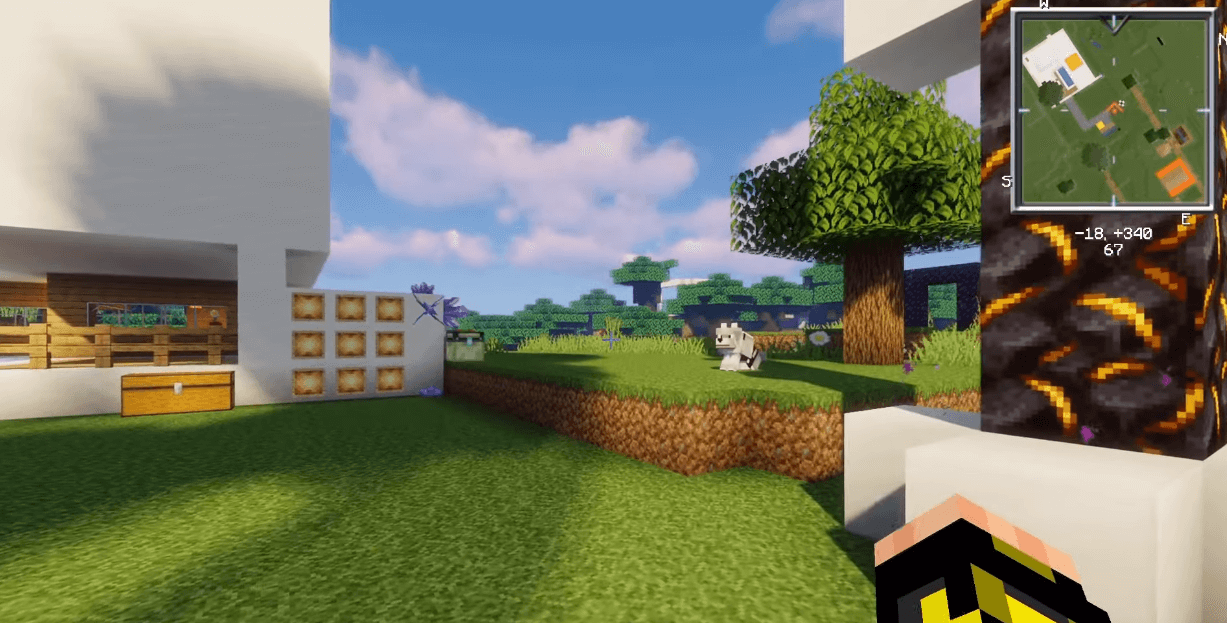
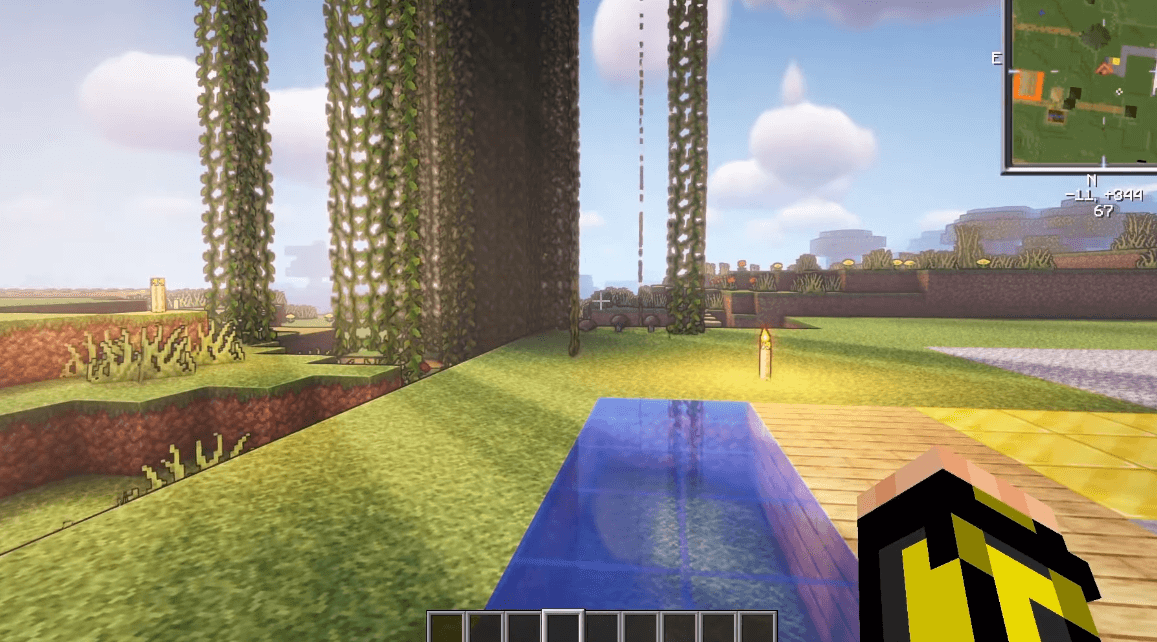
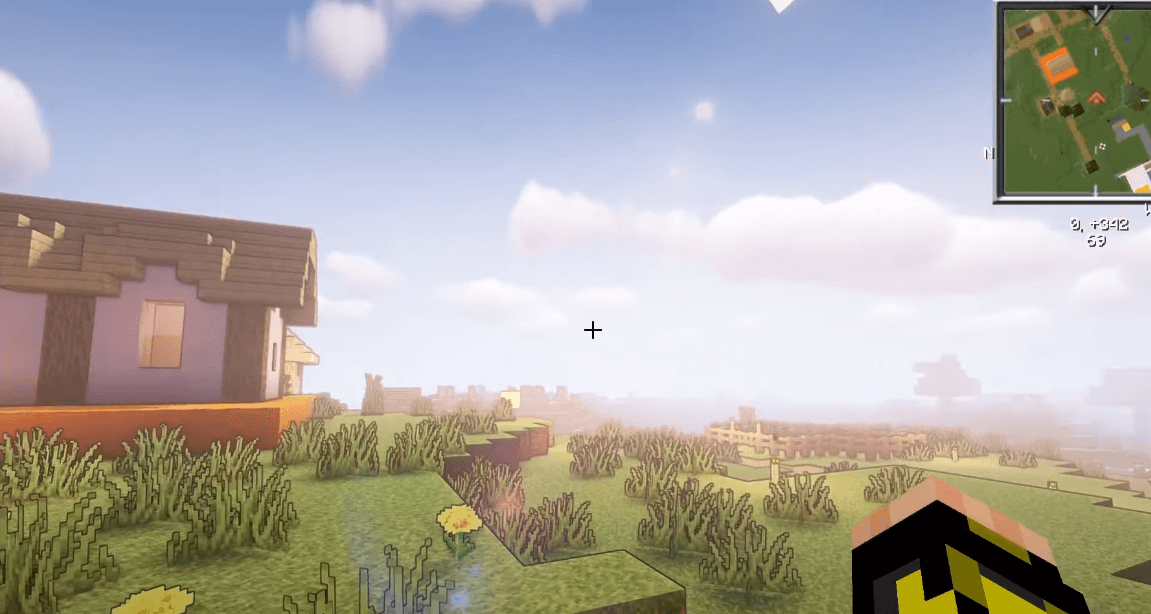
Screenshots:
Using Iris
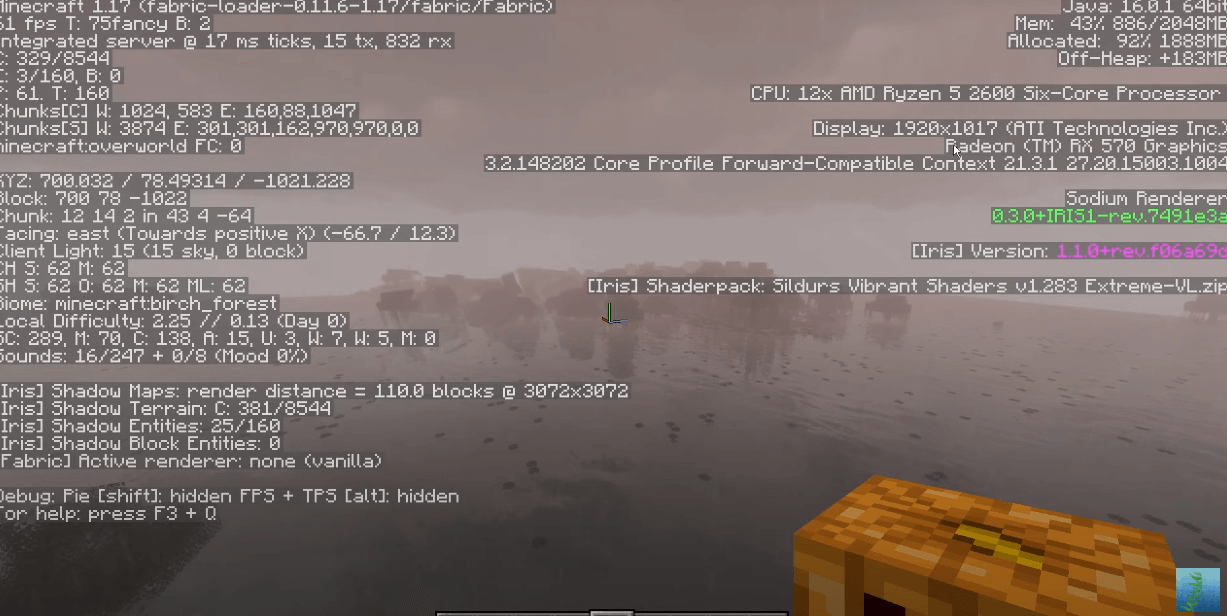
After you install Iris using one of the methods described in the Installing Iris section, make sure that it is properly installed by going into the Minecraft video settings. The video settings menu should look like this:
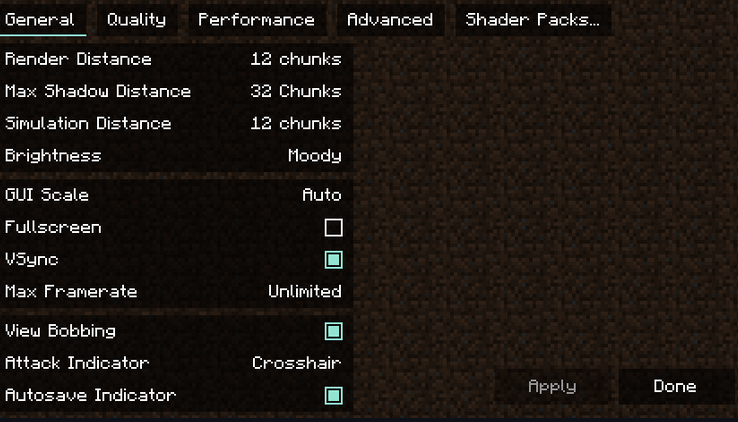
You probably noticed that the menu is completely different. It is a reworked video settings menu provided by Sodium. In the General and Quality tab, you can find all the usual settings from vanilla Minecraft which you can change to fit your preferences. The settings in the Performance and Advanced tabs should not be modified in most cases.
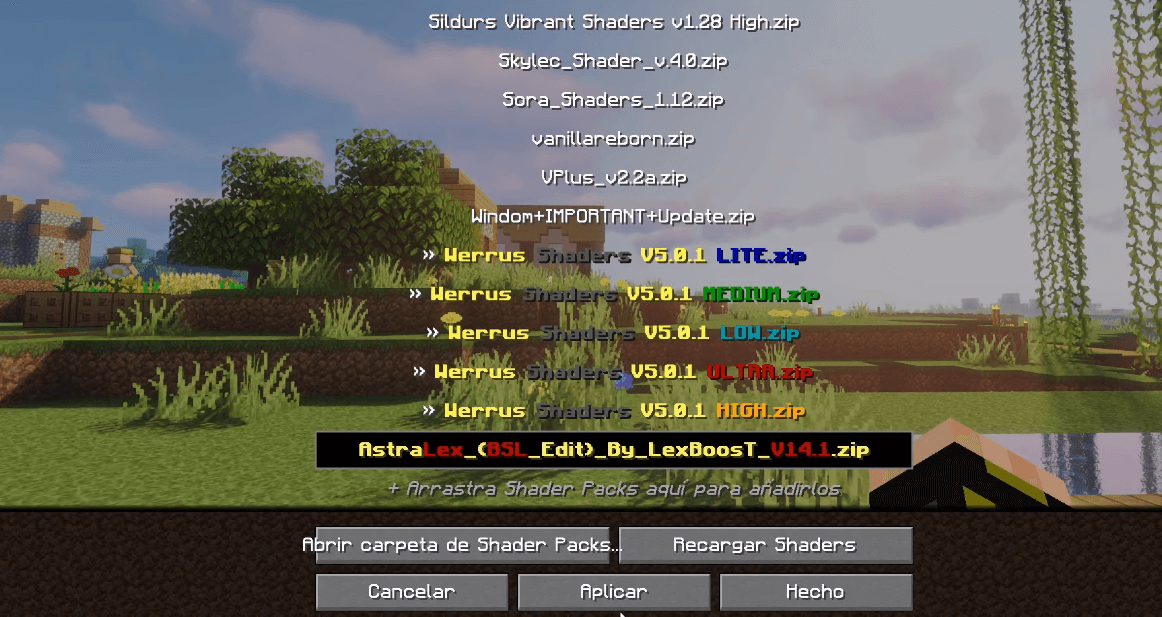
Shader packs are managed in the Shader packs tab. The shader pack menu should look like this:
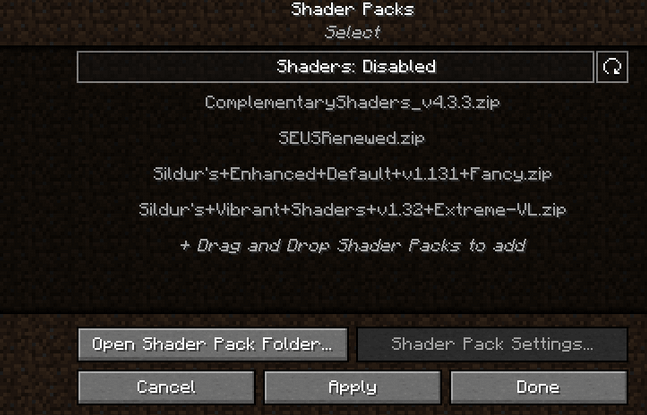
This menu shows shader packs which are in the shader packs folder. You can add new shader packs by dragging and dropping them into this menu, or by clicking the “Open Shader Pack Folder…” button and adding the shader packs into the opened folder. After adding your shader packs to the shader pack folder, click the refresh button in the top right to refresh the list of shaders. To select a shader pack, click on “Shaders: Disabled” to enable them. After that, select the shader pack you want to enable by clicking on it, then enable the selected shader by clicking the Apply button.
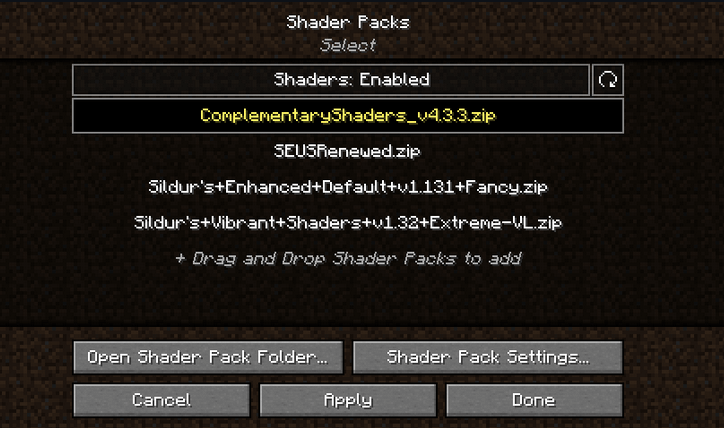
In the following example, we have successfully enabled Complementary Shaders. Notice how the font of the enabled shader changed to yellow – this is used to indicate that the shader is, in fact, enabled:
After enabling the selected shader, you can now configure it by clicking on the “Shader Pack Settings…” button. The shader pack settings menu is going to look different for each shader, since the available options are defined by the shader itself. For example, this is how the menu looks like with Complementary Shaders enabled:
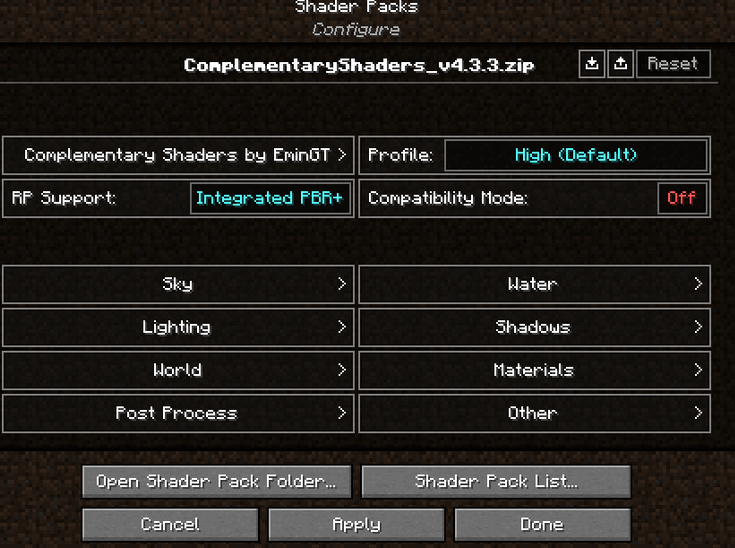
Here you can edit the shader pack options provided by the shader itself. The options in the menu should be the exact same as the options you’d get by loading the shader in Optifine. There are a few additional functions in the top right of the menu, however:
 Import button: Loads a shader setting file (.txt format) into the currently enabled shader. The button opens up a file selection prompt, letting you select the file. Useful for loading custom shader settings found online.
 Export button: Exports your currently active shader settings to a .txt file. Useful for sharing your custom shader settings.
 Reset button: Hold Left SHIFT and click this button to restore the default settings for the selected shader.


After you’re done with customizing the shader, click Apply to apply the changes. You can now go back to the shader pack list by clicking on the “Shader Pack List…” button, or to the video settings menu by clicking the “Done” button.
You can now load your world and play Minecraft with shaders! While in game, you can use keyboard shortcuts which allow you to quickly manage your shaders:
- Pressing “O” opens up the shader packs menu with a transparent background, so you can see the changes you’re making to the shader settings happen in real time.
- Pressing “K” toggles shaders on and off.
- Pressing “R” reloads the currently active shader pack.
You can rebind these keyboard shortcuts to any other key you want in the Controls menu.
Iris Shaders Mod (1.19.2, 1.18.2) Download Links:
Minecraft Game version 1.19.3
Fabric/Quilt version:
Minecraft Game version 1.19
Fabric/Quilt version:
Minecraft Game version 1.19.1
Fabric/Quilt version:
Minecraft Game version 1.19.2
Fabric/Quilt version:
Minecraft Game version 1.16.5
Fabric version:
Minecraft Game version 1.17.1
Fabric version:
Minecraft Game version 1.18.1
Fabric version:
Minecraft Game version 1.18.2
Fabric version: