Table of Contents:
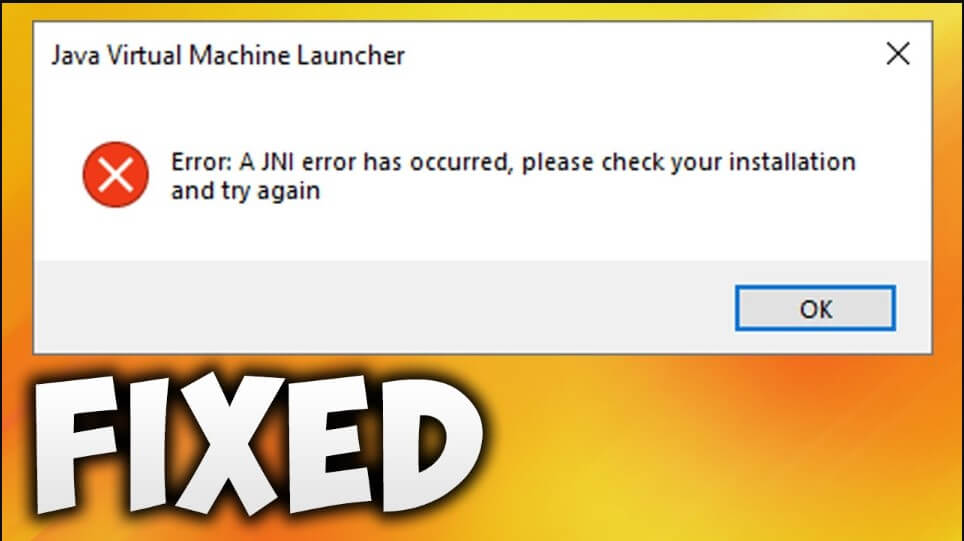
When starting the client or server, some Minecraft users encounter the following message: “A JNI issue has occurred, please check your installation and try again.” Mostly Minecraft versions 21w19a and newer experience this problem.
hello everyone welcome back to the
breakdown today i’m going to be talking
about how to fix the
jni error when starting a minecraft
server this is a
simple little air i’m going to mention
it in most of my server tutorials but
for those of you who don’t watch our
tutorials
to fix your you know create your servers
here’s how you can fix this little issue
versus
about little issues like this they’re
all taken care of by apex themselves
all you have to do on apex is start your
server and then add plugins if you want
add mods if you want worry about
managing your server
not about fixing issues like this java
issues
ddos all that stuff apex takes care of
it for you they also have 24 hours seven
day a week support such as you have an
issue on your server you can reach out
anytime day or night for some support
we’d love to stay back so much we have
strong whatsoever played our
breakdowncraft.com on them so we truly
put our money where our mouth is when it
comes to apex minecraft touching check
it apex the first link down below the
break down
xyz slash apex get your server up and
running now here’s the deal
this issue is pretty simple i’m going to
start a minecraft server here and
basically we get an error right when you
double click on this we get this error
it’s a
jni error has occurred java virtual
machine launcher please check your
installation and try again
you might be like what this is weird
i’ve always been able to start micro
servers in the past and actually
i have a vanilla 1.16.5 server here for
example
and this should work right we can double
click on server.jar and it’s going to
open up it’s going to work like there
are no problems
this is new for 1.17 servers right the
reason for this is because java switched
from java 8
to java you know basically the most
recent version of java now
java 8 will still work to run minecraft
but the back end is not going to work
anymore you’re going to need
java 16 which i’m going to show you how
to get here
first though let me go ahead and do a
real quick jump cut and i need to stop
this server there we go that server is
now stopped as you can see it worked on
our 1716 server but on the 117 server
double click on server.jar
it’s not working we do have the ela.txt
file on there says java exception has
occurred
how do we fix this issue well it’s
honestly pretty simple
right i ran into this while i was doing
my minecraft server tutorial
and this tutorial right here is outdated
i’m going to make a new tutorial that
goes right there it’s going to be
uploaded a little later but i want to
get this one out pretty soon
because i figured a lot of you would be
having issues with this right so
nevertheless here as you can see
this is our java tutorial and it’s all
been updated it’s now all changed from
what it was before
to how to get the correct version of
java for servers and mods so when you
come here
click on this yellow download link and
when you click on that link it’s going
to take you here which is a new download
page
for the java sc development kit 16 which
is what you need to run not only
minecraft servers but i’m guessing
minecraft mods moving forward i’ve seen
forge and they are going to be
upgrading as well so it’s something we
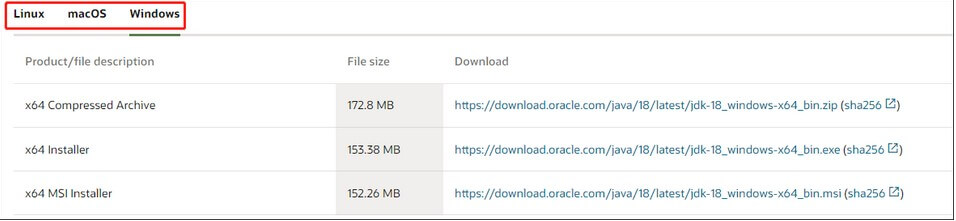
need to look at so never let us come
over here to the right hand side
we want to find the windows x64
installer click on the a little download
link to the right of that
it’s not going to come up and say i
accept the you know do you accept these
terms of service we do and click
download is then going to go ahead and
start downloading down here in the
bottom left of google chrome now you
shouldn’t need to keep this file oracle
is a very trusted developer but you
might need to save it on
mozilla firefox because i believe they
make you save everything but on google
chrome it’s probably just going to
download if you do need to keep it it’s
100 safe oracle
are the developers of java 100
aboveboard there now we go ahead and
minimize our browser if we go ahead and
refresh my desktop we will see
here is the jdk right there it is if
this isn’t on your desktop it’s going to
be in your downloads folder which you
can find by clicking the little windows
icons in the top left of my screen
probably in the bottom left of your
screen
go ahead and watch on the top bottom of
your screen type in downloads you got a
downloads file folder here and then you
will find
the jdk in this file folder i’m going to
drag to our desktop though
because that’s just easier now here’s
the deal let’s go ahead and uh
let’s go ahead and try this one more
time we’re going to try just to show you
that this is what’s going to fix this so
if we double click on server.jar we get
this error you know it plays the air
noise and a
jni error has occurred please check your
installation and try again from the java
virtual machine launcher
and then we do get another error there
that a java exception has occurred right
so nonetheless let’s go ahead now and
double click on the jdk we downloaded
right just double click on this right
here
and this is the java development kit so
it’s going to go ahead kind of load up
an installer here might take it a second
but that’s okay
basically it’s just going through and
loading up an installer preparing to
install and then it’s going to open up
this now as you can see it’s a really
easy widget you just click next
and then click next again and then it’s
going to install
java sc development kit now it might ask
me some weird stuff because i have
already fixed this and then undid what i
did
in order to do this tutorial for you all
that’s what we go through here that’s
okay but nonetheless as you can see it’s
copying new files getting everything set
up
and then it’s going to eventually finish
and when it does it’s instant it’s
instantaneous
you may have to reset your computer but
i did not so we can go ahead and click
close here and say reset i mean restart
so just you know restart boom your
computer no big deal
you’re gonna be good but as you can see
here server.jar double click on it and
it works
that simple that easy as you can see
that simple that easy as you can see
it’s now opening up and getting
everything launched it’s no longer
giving us that jni
error so i just wanted to upload this
really really fast really really quick
tutorial
nothing over the top i’m going to be
doing an in-depth tutorial giving you a
few more
strategies on different things that
could go wrong with java but uh
this is just for this simple error and i
wanted to upload it because
i think a lot of people are going to be
having it today and over the next few
months making a minecraft server
if they’ve made one of the past or if
they have and they need to update their
jobs
again our tutorial for java will be
updating but for right now this is going
to kind of serve as the basic tutorial
before a
big tutorial comes out so there you go
your minecraft 1.17 server is now live
do apologize for any choppiness or lag
that happened after i
started this server unfortunately my
computer just can’t keep up anymore with
these modern minecraft servers we’ve got
a new computer that we’re gonna be
making this summer but we’re just not
quite there yet
gotta get through this version it’ll be
the last version we probably get it m417
i’m scrambling it now but there you go
subscribe to the channel for more
awesome content come play this on our
server please breakdowncraft.com and
check out apex if you want to create a
server without these headaches however
we are here to help when they do happen
now let’s just go ahead and
type stop stop that server i’ll see you
Why does this error message “a JNI error has occurred” appear? Here are some potential causes:
- The version of Java is old: Previous versions of Minecraft came with server software that was compatible with older versions of Java. However, this is not the case with the latest Minecraft update, which now requires Java to get up and running properly.
- The Java system path corruption: Because of a misconfigured system variable path for Java, the Minecraft launcher is misled into believing that Java is not actually installed on your computer.
Whatever the root cause of this issue is, the methods provided below will enable you to quickly resolve it.
Install the most recent Java version as a first step.
A JNI error has happened. When you attempt to launch Minecraft or a Minecraft server on a computer that does not have the most recent version installed, a Minecraft server error will appear. You only need to update your Java to the most recent version to resolve this.
By doing the following steps, you can finish installing the most recent version of Minecraft for Java:
Advice: Ensure that the Minecraft launcher—Tlauncher or any other—is shut off completely.
Step 1: Access the official website and get the most recent Java version. Here, you must accurately download the installation package that you require. The file with a.exe extension can be downloaded by Windows users.
Step 2: Install Java on your PC after downloading it. Simply double-click the downloaded program to start the installer, and agree to any changes it requests.
Step 3: To complete the installation, adhere to the on-screen directions.
If the “a JNI error has occurred” problem still shows after that, you can check.
Solution 2: Eliminate faulty Java system path variables
This “a JNI error has occured Minecraft” error is caused by a damaged system path variable for Java if the first method doesn’t work.
In this situation, entering the System Properties panel and making changes to the environment variables in a way that gets rid of the Java environment variables would solve the issue.
Here is the advice to help you:
Step 1: To launch the Run dialog box, press the Win + R key. After that, enter sysdm.cpl into the box.
Step 2: Select the Advanced tab in the System Properties window, then click the Environment Variables button.
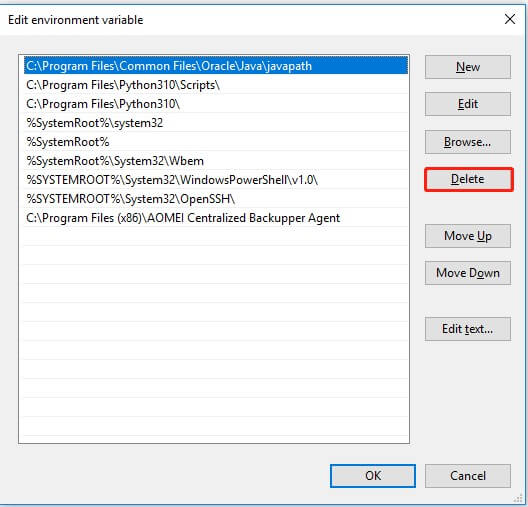
Step 3: After opening the System Variables window, select Path from the System variables section and press the Edit button.
Step 4: Look for the Java environment variables in the following window. After that, click Delete on it.
Start Minecraft once more after restarting your computer to check if the “a JNI error has occurred” problem has been resolved.
")

