Table of Contents:
The XNet mod is a mod for Minecraft that introduces a single type of cable: a networking cable. Using this network, you can transport items, fluids, energy and information instantly without any lag whatsoever. The XNet mod’s main focus is efficiency and flexibility. Efficiency in that it is possible to make huge networks with no lag. Flexibility in that the controller allows for really flexible configuration for distributing information
XNet is a mod that’s all about efficiency. The cables system makes it so you can make huge systems without any overhead, and each cable will fit 12000 blocks long! It’ll be just as fast to travel from point A-B with this kind of distance – even if we’re talking small distances like 5 block stretches here (which really add up!).
How to install Download XNet Mod 1.18.1, 1.16.5 for Minecraft?
Follows 5 Steps below to install Download XNet Mod for Minecraft on Windows and Mac :
1. Download and install Minecraft Forge, you can read the instructions below the article.
2. Download the Download XNet Mod for Minecraft.
3. Open the . minecraft folder and then enter the mods folder. Important: Some older versions of Forge may not have the ‘Open Mods Folder’ button. If this is the case, create the directory under the name mods.
Windows:
Press the Windows key +R at the same time
Type %appdata% and press enter
Find folder Minecraft and then look for the Mods folder within that
Mac:
Click on the desktop and then press Command+Shift+G all at the same time
Type ~/Library and press enter
Open the folder Application Support and then Minecraft.
4. From here, drag in the mods file downloaded (.jar or .zip) you wish to add.
5. Run Minecraft, and you should now see the new mod installed in the list!
Enjoy Download XNet Mod for Minecraft, If there is an error, please comment on this article we will support.
Features:
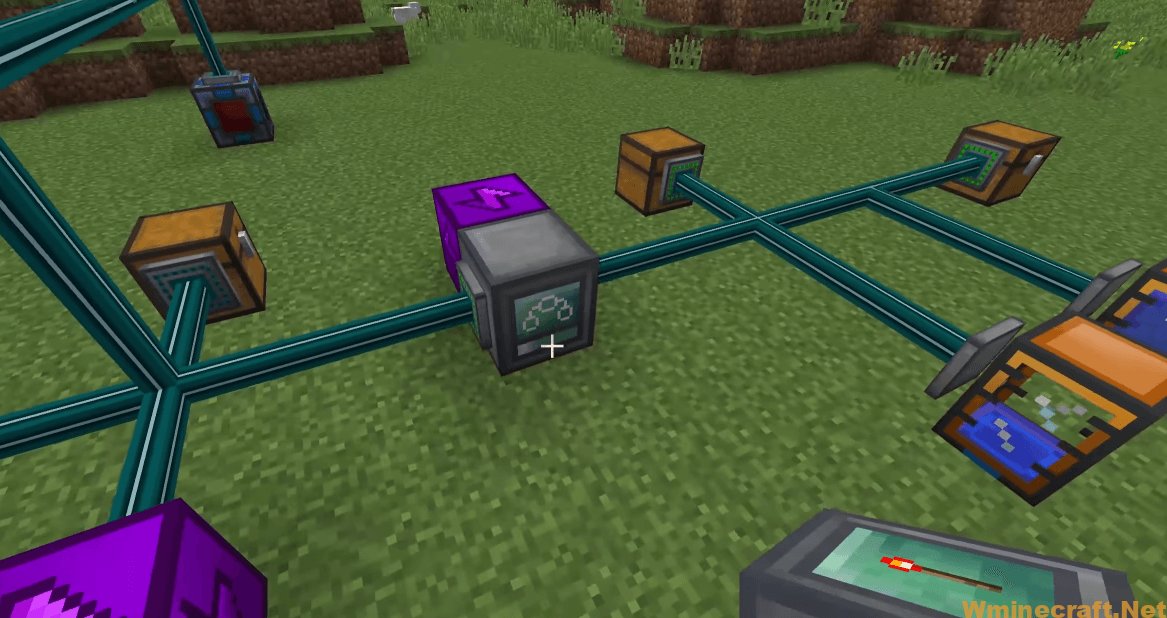
Networks
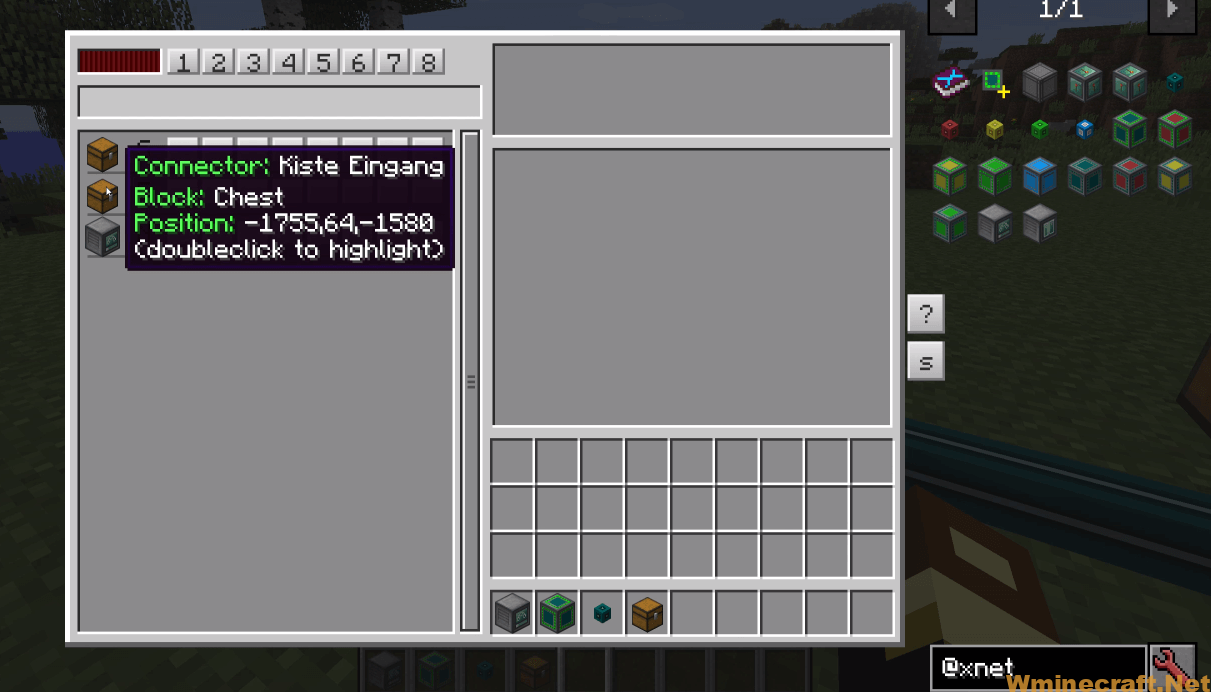
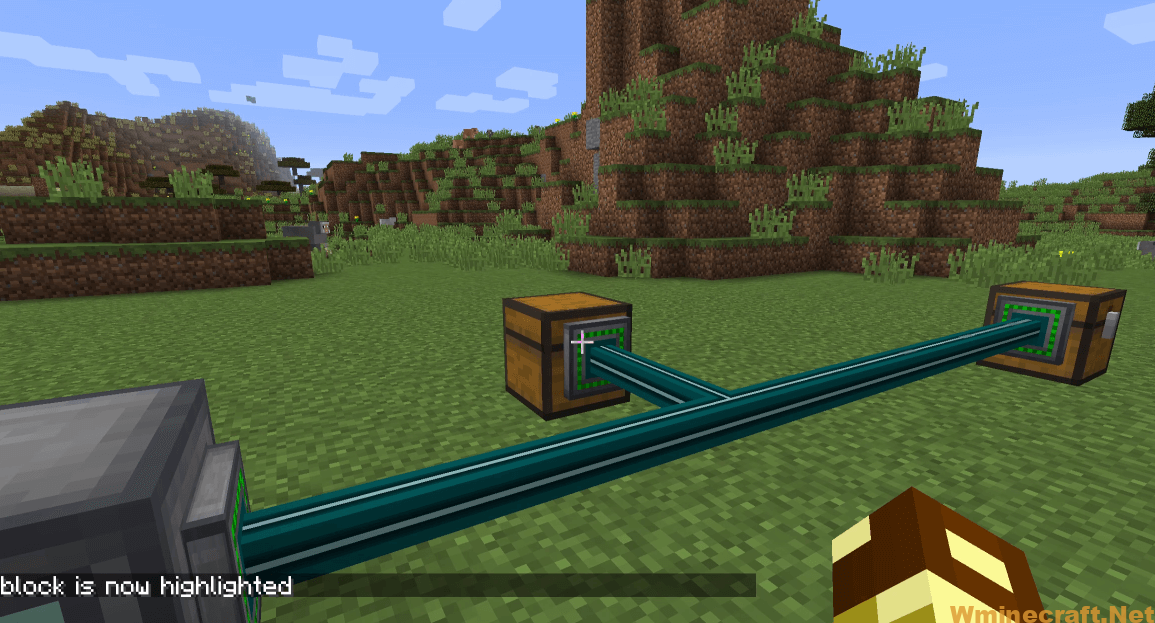
At the core of this mod is a network. A network is basically a single section of connected cables connected (via connectors) to various blocks (chests, machines, …) and one controller. The controller is the block that does the actual work for that network.
Channels
Every network can have 8 channels maximum. Every channel has a type (energy, item, fluid, logic, …) that you can configure in the controller. Depending on the type of a channel and the machines that are connected to that channel various things can happen.
Connectors
You use connectors to connect machines to your network. Through that connector various channels (even with different types) can do their thing.
Normal connectors only allow access through the side from which you are placing the connector. i.e. for a vanilla furnace that would mean that with a normal connector you can only get the melted result by placing a connector at the bottom of the furnace.
Using advanced connectors you can overcome that limitation and access the down side of a furnace from any other side. Advanced connectors have other advantages. They allow higher speeds for item and fluid transfer (10 ticks minimum per operation as opposed to 20) and can store more RF (which means they can also transfer more RF).
One warning: an advanced energy connector can still not extract energy from another side. The reason for this is that it is actually the generator/producer itself that pushes energy and it will not do that through that other side. Insertion of energy to another side does work however.
Cables and Colors
Cables (and connectors) can have four different colors. These are used to be able to distinguish multiple distinct networks adjacent to each others (to prevent the cables from connecting). A controller will adapt its color to the first colored cable it can find around it and then remember that (unless that color is totally removed).
Logic Channel
The logic channel is special. First one has to know that every network has seven colors (don’t confuse these with cable colors) which is either enabled or disabled.
By default all colors are disabled. Every connector (in the controller GUI) can be configured to be active only when a number (up to four) colors are active. Using a logic channel and sensors you can (based on various conditions) enable colors.
For example, you can have one sensor detecting how much RF is left in a machine. And if that number goes below 1000 enable ‘red’. Then another sensor can detect if there is enough coal in a chest and if true enable ‘green’.
Then you can have an item channel transporting coal to a coal generator but only when both ‘red’ and ‘green’ are enabled. So that means: only enable the coal generator is power is low and there is enough coal. Sensors themselves can also be enabled/disabled based on colors.
Routing Network
If you want to go beyond the 8 channel limit or you want to connect multiple distinct networks you can make a ‘routing network’ using routers. A single router is already sufficient to connect up to six (six sides of the router) channels but using routing cables and routing connectors you can also make a routing network out of routers. Note that on a single routing network you can only have 32 published channels.
Named Channel
Inside the GUI of the controller you can give a channel a name. This name isn’t used anywhere except with the router that is directly attached to this network though a connector. Only channels that have a name will be visible locally in the routing GUI.
Published Channel
Every named channel can be published on a routing network (or with a router). This has to be done in the routing GUI by giving it a published name. The published name is the name with which that channel will be known on the routing network. Note that types are also considered. You have a a published channel called ‘foo’ for items and another published channel called ‘foo’ for fluids on the same network but they will not interact and only count as one channel for the channel limit.
Item and Fluid Transfer
One thing to note is that item and fluid transfer is always immediate. There are never items or fluids ‘inside’ the network. If there is no room for items or fluids to go too in a network then they will not leave their destination.
Power Transfer
Power transfer works differently. Since RF and Forge Energy are ‘push’ systems (i.e. a powercell or generator pushes energy to adjacent machines) the connector needs to have an internal RF storage. The advanced connector can store more then the normal connector which means it can also transfer more. When you have an energy channel distributing energy to various machines then the power first has to go to the connector (pushed by the generator) and then it can be transfered to all machines that need it.
Power Usage
The controller needs power to do this. There are basically three power consumption areas:
- Constant powerdrain: this is by default set to 0
- Constant powerdrain per active channel: this is by default set to 1
- Powerdrain per operation: this is by default set to 2
XNet Mod Screenshots:

XNet Mod 1.18.1, 1.16.5 Download Links:
Minecraft Game version 1.11.2:![]()
Minecraft Game version 1.12.1/1.12:![]()
Minecraft Game version 1.12.2:![]()
Minecraft Game version 1.14.4:![]()
Minecraft Game version 1.15.2:![]()
Minecraft Game version 1.16.2:![]()
Minecraft Game version 1.16.4:![]()
Minecraft Game version 1.16.5:![]()
Minecraft Game version 1.18.1:![]()
How To Download and Install Minecraft Forge (Modding API)?
Minecraft Forge is a free, open-source server that allows players to install and run Minecraft mods. 4 steps to install forge for windows, mac, Linux
1. Download Minecraft Forge at the website, select the version of Minecraft you want to run, then download the installer using your browser.
2. Open the .jar file you just downloaded (Run installer as Administrator), make sure Java is installed on your operating system
3. Select Install Client or Install Server if you want to install for your server, and click OK. Wait about 2 minutes, and you will see a success message.

4. Launch Minecraft and select the Forge profile, then click Play.
5. You will see Minecraft Forge in the lower-left corner and the Mods button under Multiplayer.

Congratulations on successfully installing Minecraft Forge and experimenting with XNet Mod for Minecraft downloaded.
If there are errors, please comment on this article.