Table of Contents:

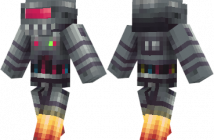
Robot from Portal 2.
How to install Atlas Skin Minecraft:
For official game version:
Skin Installation:
- Download skin from the link provided below
- Go to Minecraft.net > Click profile > Browse your new Skin
- Upload image
- Done and enjoy new skin
Installation on unofficial Minecraft versions 1.7.10 and higher:
- Download the skin and rename it to steve.png.
- Open the game data folder. To do this, press WIN + R and enter %AppData%.minecraft.
- Open the folder whose name corresponds to your version of the game.
- Inside there will be a file [version of the game].jar, which must be opened using any archiver program (for example, WinRAR or 7Zip).
- Inside the archive, go this way through the folders: assets> minecraft> textures> entity.
- Drop the steve.png file into this folder by dragging it with the mouse into the archiver window.
- Start the game and evaluate the new look of the main character.
Installation on unofficial Minecraft versions 1.5.2-1.7.10:
-
-
- Download the skin and rename it to char.png.
- Open the game data folder. To do this, press WIN + R and enter %AppData%.minecraft.
- Go to the ‘bin’ folder and open the ‘minecraft.jar’ file with any archiver (for example, WinRAR or 7Zip).
- Inside the archive, open the mob folder.
- Drop the char.png file into this folder by dragging it with the mouse into the archiver window.
- Launch Minecraft and see if the changes take effect.
-


